Brain has been behaving badly recently, my waking hours have been truly bizarre and rest doesn't come easily (typical with narcolepsy, but I'm looking into specifically why things have been more difficult lately with my various doctors.) Following patterns for crafting has therefore been tricky, and I've caught myself falling back on things I don't need patterns for, like washcloths and small, improvised amigurumi. But more than that, I've just been driven to create more of what is in my head, and less of what is already designed. Of course, I then go back and stress over how to write the pattern - so I plan to be more disciplined from here on out and just write the pattern down as I go. Hopefully I'll get some new patterns up in the near future, possibly a Halloween themed one? Thoughts?
I would really prefer to make money to support my project from pattern sales than from selling amigurumi, because I believe my time is better spent making items for donation than for sale - that being said, even though each doll I make is time consuming, each sale sponsors more dolls for donation, and I figure people might be looking for holiday gifts in the near future. So I've done a little Etsy shop configuration, and here's what I've come up with for changes.
-Custom amigurumi are now $25 for a doll approx 4-6" - I am willing to ship internationally, just contact me beforehand so I can calculate the postage. I currently have five available, I'll re-stock as necessary when those are done. The time estimate is a bit long just in case I end up with all of the orders coming in at once, but realistically, it should be shorter. Feel free to contact me if you need something quickly, chances are I'll be able to help.
If you want an amigurumi made from a specific pattern, I can do that - if I don't have the pattern in my library, I will purchase one if it will be suitable for making donated items later. Please note, any pattern that states that items made from it are not to be sold is not eligible for this - such a statement is not legally binding, but I do choose to respect the wishes of the designers.
-Little Visitor dolls are now available in the shop for $12 in custom colors, each one comes with a top hat :)
-The Little Visitor pattern is still available as a PDF download for $3.00 on Etsy and Ravelry. The $.50 follower discount still applies on Ravelry - contact me and I'll give you the coupon code. I tested the pattern multiple times myself before publishing, so it should be correct.
-Smaller amigurumi (about 2-3") are also available for $12, contact me via private message to order. I've stocked up on them with the intention to have them sold at a local shop, but as long as I still have them, they're up for grabs.
-I can also make baby items - I don't have the time to do large projects like blankets/clothes, but I can do hats and booties and other small items, including amigurumi that is more appropriate for baby gifts (made with cotton yarn, all one piece, etc).
Still trying to figure out how to replicate Sophie's dress, but that pattern should be drafted soon and ready for testing, after which the dolls made to test the pattern will be available for sale (since there are small pieces, I won't be donating those).
Click here to visit my Etsy shop (this link will take you to the store front, so you can see anything I might have added since I wrote this post originally)
I should have more project photos up soon, I keep forgetting to take photos while it's still light outside.
I hope you're all well and happy! I plan to update the Crafts for a Cause page very soon, so stay tuned! :) In the meantime, stay creative, and keep me posted on what you're working on!
Showing posts with label yarn. Show all posts
Showing posts with label yarn. Show all posts
Friday, September 13, 2013
Wednesday, June 12, 2013
How to Make My Dad (or yours!)
Once I got my craft supplies back from the storage unit, I decided to make my dad for father's day! Now you can too! Here's how:


 Stuff the body firmly. I put some plastic pellets in the bottom so it would be more stable when standing. If you gave your dad extra thick or longer hair, you may need to put a coin or two or a marble into the bottom so it will stand up. Sew body to head.

Ingredients:
-3.75mm hook & 3.25mm hook
-9mm safety eyes, color of your choice
-small amount of cream colored medium weight yarn for head/hands
-colors of your choice for pants & shirt, scraps can be used!
-lace weight yarn or craft thread for hair & mouth
-felt & fabric glue for the tie
Directions:
*Head
Round 1: With cream color: make your original foundation row with six stitches (chain 2, 6sc in first ch, or use the magic ring method).
Round 2: 2 sc in each stitch around (12 stitches)
Round 3: 2 sc in next stitch, sc in next stitch around (18 stitches)
Round 4: 2sc in next stitch, sc in next 2 stitches around (24 stitches)
Round 5: 2sc in next stitch, sc in next 3 stitches around (30 stitches)
Round 6: 2sc in nect stitch, sc in next 4 stitches around (36 stitches)
Round 7-9 sc around (36 stitches) *depending on your stitch size and how you want the finished product to look, add or subtract a row as necessary
Round 10: sc2tog, sc in next 4 stitches (around)
Attach safety eyes and sew on the hair, make the stitches slightly loose so they won't pull when you stuff the piece. I used a satin stitch to make my dad's hairdo.


Round 11: sc2tog, sc in next 3 stitches (around)
Round 12: sc2tog, sc in next 2 stitches (around)
Start stuffing firmly.
Round 13: sc2tog, sc in next stitch (around)
Round 14: sc2tog until piece is closed up enough to tie off. Hide the end of the tail of yarn inside the head. Sew on mouth with pink embroidery floss or craft thread.
*Body
Note: before you make the body, check my photo. If you want your dad's body to be thinner or taller than mine, adjust your design accordingly by adding/subtracting rows & stitches. For a taller dad, increase both the pants and shirt rows by one or two. I'd increase them equally so your dad looks proportionate - but you know best how your dad looks!
Round 1: With dark blue (or "pants" color), make your foundation row or six stitches.
Round 2-4 are worked just like the body.
Rounds 4-6 sc around
At round 7, change to light blue (or shirt color). I used a lighter weight yarn, so I had to increase the number of stitches - I increased every other stitch to expand the body a little bit so he would have a rounder body - I just wanted the base to be sturdy so it would stand. If your dad is thin and you want to make his doll thin, you may want simply use medium weight yarn and keep the stitch count the same.
Round 8: sc around with shirt color
Round 9: at this point you want to start very slowly decreasing. With the DK weight yarn, I decreased every sixth stitch around. Do whatever looks right so you have a nice, even taper (this can also be fixed with stuffing later.)
Round 10: Continue decreasing, I decreased every 4th stitch.
Round 11: If your piece needs to taper more, decrease every few stitches around. I just crocheted around for rows 11 & 12.
Leave the top of the body open with a tail end of yarn still attached for sewing to the head later. Leave unstuffed so you can sew the arms on easily.
*Arms
Round 1: With cream yarn, make your initial row with 5 stitches.
Round 2: sc around (5 stitches)
Round 3: change to light blue (shirt color) and start using smaller hook, sc around (5 stitches)
Round 4-6 sc around. Leave a tail end and use it to sew the arms to the top row of the body.
 Stuff the body firmly. I put some plastic pellets in the bottom so it would be more stable when standing. If you gave your dad extra thick or longer hair, you may need to put a coin or two or a marble into the bottom so it will stand up. Sew body to head.
*Tie - make with felt and glue right at the top of the body.
And you're done! :) Please let me know how this pattern worked for you. Happy crafting and happy fathers day to all the dads out there!

Friday, May 3, 2013
Cotton Addiction

One of the books I got yesterday was Crocheted Bakemono (Monsters!) by Lan-Anh Bui and Josephine Wan. Many of the patterns call for fun colors, which I don't often get to use because most of what I make are animals.
The yarn usually comes twisted up, as you can see to the left and down below. You can see the whole array of colors in a variegated or painted yarn design this way. These particular yarns are Cascade brand Ultra Pima. (Except for the smaller skein up top there, which I'll explain later.) So soft!

Got a nice pink-purple, dark teal, seafoam green (which looks grey in that picture, but it's not I promise ha-) and a sky blue. They'll look great in any combination.


These yarns give excellent results in amigurumi... so far I've only tested it out in baby gifts for friends, but I'm very glad to have a larger supply now so that I can make some for my donations project. It's so nice to work with... (grabs hook)
Thursday, May 2, 2013
Two for the road

Still working out my upcoming housing situation... it appears that a house isn't in the cards, so I'm going to have to look into alternatives. I definitely want to get these little guys to the hospital before I have to uproot. More information when I have it ~
(Design credits: Puffy Pals by Sayjai for the frog, and the mini ami bunny from Amigurumi World by Ana Paula Rimoli)
Friday, April 19, 2013
All but the tail
The frog is all done, and I managed to make the monkey arms and legs that match. When I wake up, I'll just have to do the tail and stitch them to the rest of the body. I've been watching Keeping Up Appearances and I work, picking up tips that I can implement when my world traveler gets home, for being a hostess and such when we have our house, ways to alienate neighbors... I'm not sure I could get my voice to be so grating, but I'll give it a go.
Just two more days and then hopefully we can get this house hunt under way. My son isn't too happy about having to move, but I hope he will feel better about it in time. I'm not especially looking forward to the process myself, but it'll be better in the long run.
Hmm, will also need an elephant in this animal mix of mine... I love it when I finish up the projects I'm working on, means I get to go dig through all my patterns and choose new ones to start on. Really tempted to mess around with some more wool yarn, it was so much fun making those koala bears. They're a bit harder to shape, but for rounder creatures that's not a problem, and the end products are so squishable!
Also must remember to get a hole punch and make a mini page on my blog for care instructions... I have some business cards with the URL and my e-mail in case of problems/questions, and I'll be writing the materials & any notes on the back. My plan is to keep a careful log of all the animals I donate so I can give each one a number... then if an arm or leg falls off or they need a replacement, I'll know exactly what yarn I used and can make a (close) replica. They don't fall apart easily, so if they do need fixing, it'll mean they're loved... and that's a good thing. I'd certainly replace or repair them if needed! :)
And now, I am tired, so off to bed I go.
Happy Friday!
Friday, April 5, 2013
Sundry's Debut!
I'm pleased to announce that I've completed the very first Sundry the Second Chance Monster!

 I've been too spastic to deal with patterns or to be able to make even stitches, which meant it was a perfect day to follow the yarn where it took me, and this is the result! I'll have to get some better pictures when I have something other than my cell phone to take them with :) The flash bleached out the blue button eyes a bit, but she really is quite colorful!
I may be able to post an actual pattern for her at some point, but it's tricky because the yarn varies in size, so I basically had to stitch differently in each row to make them even (ish). Here's the basic concept: if you can get a bowling pin sort of shape about 24 stitches around at the wide part of the head, decrease to 15 or so stitches for the neck, and then back up to around 30-35 around for the body. Keep going until it looks like the "right size" (some of the rows will vary in width, so don't worry about the number.)
I did the bottom few rows in the back loops only so they would taper, and began to decrease around, also in the back loops only. *This is important, since it effectively fixes the gaps that are sometimes left between stitch decreases. Stuff rather gently, since the silk yarn has no give -- it molds very nicely as long as it isn't over-stuffed. Finish off when the hole at the bottom is quite small by putting a slip stitch across the gap. Tie off and pull the end of the yarn through the body, pull tightly so that the bottom will sit flat (this won't happen if there's a giant knot).
Hair: Wrap silk yarn several times around the widest part of your palm. Gather in the center, and sew to the top of the head. This is tricky since the silk yarn is so dense, I used a yarn needle and 4 strands of embroidery floss. Wrap around and knot at the bottom first, rather gently, and then make as many stitches as you can up the center part. Cut the loops so you get single strands of hair.
Arms: Cut three rather long lengths. Hold one end of them in your teeth, braid. Tie a knot near ONE end, leave tails for fingers. Use a large crochet hook to pull the braid through the body, pull to desired length. Make another knot for the other hand, cut off the braid, leaving tails for fingers.
Don't worry if it looks lopsided, this design is very mush-friendly and will hold its shape nicely!
:)
Enjoy & feel free to e-mail me/leave comments with any questions!! These will be on sale at some point to help fund the materials for my donations.
Monday, April 1, 2013
To the beach and back again
We had a great time with our little weekend trip, since my son has been asking to go somewhere we decided to include it as a birthday present. He's not hard to please trip-wise, and thankfully we managed to find a place to get gluten free pancakes, so all was well. I'm a bit worn out, but it was well worth it. He seems to be going through a sort of insecure phase right now, so spending extra time together was good.
I'm nearly finished with a monkey for donation, and finally broke down and got a yarn swift to help me wind up these twists that sometimes give me trouble with knots. Thankfully, my better half has a talent with such things, I like to say it's because he was a boy scout, but it's really because he flies kites (he started teaching my son while we were at the beach). I don't mind winding the yarn by hand, especially the recycled sari silk, since it balls up so nicely. The colors are so nice, too, I kind of enjoy exploring the different handiwork, colors and textures before they get hidden under layers.
So much to do, so much bad weather to make me sleep -- but push on we must! I was at least a little bit productive today. My son's school project is to make an invention, and he decided to make an insect habitat. I made him a fuzzy recycled silk caterpillar to use in his model. Boys and their bugs. The sari silk was perfect for the purpose though. The more I work with it the easier it gets to make it do what I want it to (sometimes, hah).
Just about time for me to get him ready for bed. Hope everybody had a good holiday weekend!
Saturday, March 23, 2013
A Very Happy Birthday
 We celebrated my son's 7th birthday this evening. He was very excited
about his special dinner, his cards, and of course, his lemon meringue
pie (he inherited his favorite dessert from me). My mom did the gluten
free cooking, and tried to make sure the house didn't burn down as the
candles got lit. It was nice to have everyone together. He absolutely
loved the little animals in the box-house. I had the man with the
camera take photos before I gave it to him so I could post them :)
We celebrated my son's 7th birthday this evening. He was very excited
about his special dinner, his cards, and of course, his lemon meringue
pie (he inherited his favorite dessert from me). My mom did the gluten
free cooking, and tried to make sure the house didn't burn down as the
candles got lit. It was nice to have everyone together. He absolutely
loved the little animals in the box-house. I had the man with the
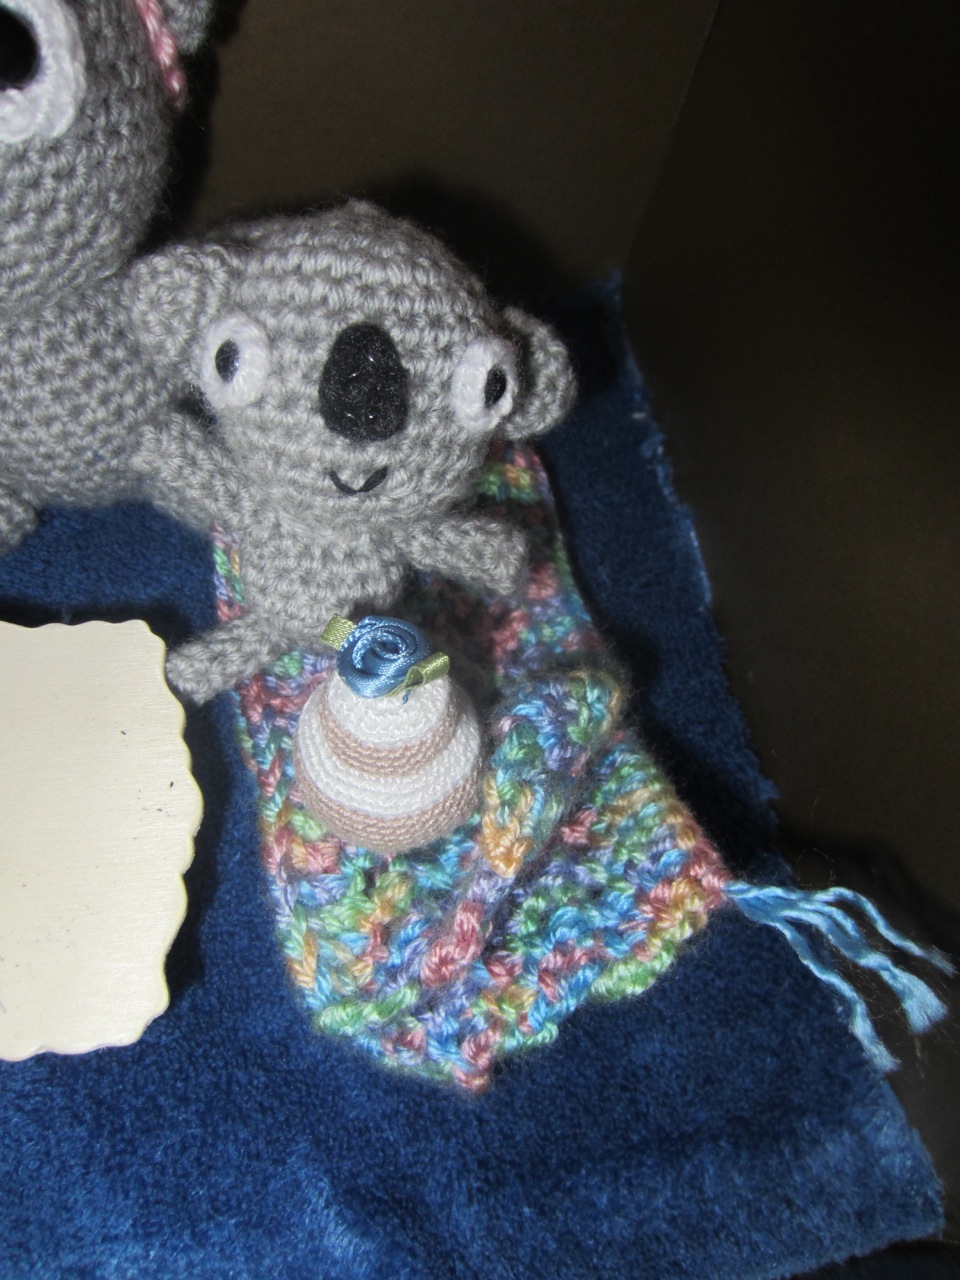
camera take photos before I gave it to him so I could post them :) Credits go to Ana Paula Rimoli, mostly, for designing the koalas, the cake, and the fish (I had to make minor changes because I decreased the sizes, emphasis on tiny cake, cough, hand cramp, cough), from her book Amigurumi Toy Box, and Annie Obaachan's Super Cute Crochet for the penguin.

The koalas are made of wool yarn, trying out new materials :) they're so soft! The cake is made of lace weight viscose (from bamboo) -- closest I could get to eucalyptus! Penguin and fish are acrylic, except for the craft thread I used for the penguin's mouth and feet (which are cotton.)

I HAS A CAKE!

The penguin has a fish... I don't think he'll have to share.


(omnomnomnom all for meeeee)
Thursday, March 21, 2013
A few more friends
The sun was shining in my living room window, so I took this of three of the donations I've made (think I have fingerprints on my camera lens, figures).
The pig is from Puffy Pals, by Sayjai of K and J Dolls (http://kandjdolls.blogspot.com/) available from Amazon Kindle.
The hippo is from Easy Crochet Critters from Leisure Arts
The lamb pattern is from Tiny Yarn Animals, by Tamie Snow
 I hope these little friends will make someone's day a bit brighter. Working on baby koala now... wish me luck! I'll need it if I'm going to get these done in time!
The pig is from Puffy Pals, by Sayjai of K and J Dolls (http://kandjdolls.blogspot.com/) available from Amazon Kindle.
The hippo is from Easy Crochet Critters from Leisure Arts
The lamb pattern is from Tiny Yarn Animals, by Tamie Snow

Wednesday, March 20, 2013
Penguin Invasion
The bad lighting in my apartment couldn't stop me from taking a few
snaps of the finished penguin I made for my son's birthday. I modified
the design from Annie Obaachan's Super Cute Crochet (Quantum Publishing Ltd, 2009).
I had to make him quite small so he would fit in the box, and he came out with a funny quizzical expression :) Nearly done with mother koala, must hurry up before time runs out!


I had to make him quite small so he would fit in the box, and he came out with a funny quizzical expression :) Nearly done with mother koala, must hurry up before time runs out!


Tuesday, March 19, 2013
A break for a birthday
I've been working away at making presents for my son's birthday. I got some cuddly gray wool yarn to make a mama and baby koala, as seen in Ana Paula Rimoli's Amigurumi Toy Box (Martingale & Company, 2011). Definitely one of my favorite books to work from so far, and my son has often expressed interest in the playful designs. I've decided to make a little party in a box for him, a few little creatures around a tiny table with an amigurumi cake and a few little presents for the animals -- hats, scarves, maybe a little teddy bear if I can manage it with craft thread. Last year I was having a medical procedure and couldn't make it to his birthday party, I'd like to make sure his birthday is extra special. I'll be back to my donation projects as soon as I'm done with his little toy house, which shouldn't be very long... I can't believe he will be seven in just a few days. Kids grow up too fast!
Friday, March 8, 2013
Of Ounces and Yards
Whew, been a long week. The weather had me down with headaches. I've been pushing ahead with my moose, regardless... the gloves do seem to help with the rash, as do my new crochet hooks (it hasn't gotten worse even when the gloves get too warm to wear them). I'm sort of surprised at how fast the yarn goes -- and I'm at the end of my first bag of Poly-Fil already. Not everything turned out quite right, but I have a few donations ready, and all that's left of the moose is sewing his horns together and making his arms and legs. Haven't decided what to do for my next one yet, so many good options... this moose is larger than most, so I'll probably do a few small ones before tackling something so large again! At least he didn't turn out cross-eyed, like my poor panda bear did. I'm learning the value of clear directions and specific materials lists!
I do hope this weather stops bothering me soon, I would like to be able to make faster progress. I acknowledge my limitations, but often have trouble accepting them. Anyhow, I think it's about time for breakfast, then to get this poor moose together :)
I do hope this weather stops bothering me soon, I would like to be able to make faster progress. I acknowledge my limitations, but often have trouble accepting them. Anyhow, I think it's about time for breakfast, then to get this poor moose together :)
Tuesday, February 26, 2013
Prickly Progress
Well, the rash hasn't let up since the hooks were coated in polish, and it has spread to the insides of my fingers now. Must be an additive in the yarn as well. I've pushed ahead and I now have a hippo, a lion, and a pig finished, and I'm working on a giraffe. Finally ordered the pellets for stability, and am hoping the craft gloves get here soon. I can't stop stitching!! I think I'll try to make about thirty for my initial donation... so many cute designs to choose from! I've got supplies galore and it should last me awhile. Send good vibes for my incoming packages...
Saturday, February 23, 2013
With a little polish...
Turns out it was the hook causing my skin reaction, instead of the yarn. Called the man of the house at work and asked him to bring home some clear nail polish to coat the hooks (hope it works). He asks where he would obtain such an item. Sigh. When he got home, he told me that next to the nail polish he saw something called "top coat" and asked whether he needed that, too. I told him he's never going to be beautiful if he doesn't know these things. He says that's just fine with him. It's true, he's the sort that can wear pink and still look masculine. :)
So with my crochet hooks coated, I ordered a fairly inexpensive set with bamboo handles online. I don't know if they'll be any good, but nail polish chips and wears off. I also ordered some crochet gloves, so hopefully one or the other will solve this problem. I'm usually the type to shrug it off and keep going, but it's getting pretty painful. I'm going to have to take a break for a few days, I think. Hopefully my reinforcements arrive soon so I can give my partial hippo the feet he deserves!
So with my crochet hooks coated, I ordered a fairly inexpensive set with bamboo handles online. I don't know if they'll be any good, but nail polish chips and wears off. I also ordered some crochet gloves, so hopefully one or the other will solve this problem. I'm usually the type to shrug it off and keep going, but it's getting pretty painful. I'm going to have to take a break for a few days, I think. Hopefully my reinforcements arrive soon so I can give my partial hippo the feet he deserves!
Friday, February 22, 2013
The yarn bites back!
Apparently there's something in this new brand of yarn that I'm allergic to! I'm going to have to find a way to rinse out the yarn before I keep going on my little lion project. Back to the old stuff until my hand heals, and it'll slow me down a little. Just as well I suppose, since the lighting in my apartment is absolutely terrible, I'll probably try to find a good spot outside to take photos, or take them to a friend's house.
I think the pig and the lion need a monkey to hang out with :)
I think the pig and the lion need a monkey to hang out with :)
Monday, February 18, 2013
Patterns Needed!
I want to make sure I don't use designs for this project without permission (at least, by posting photos here of the items I'll be donating.) If you have patterns of your own that you would like to allow me to use, please let me know! The more variety, the better. Anything you allow me to use will be fully credited (none of this is for profit.) I want to have plenty of designs on hand that will be suitable for boys and girls of various age ranges, and some that are baby safe would be nice. Feel free to post suggestions via comment, or you can link to my Google+ profile and send me an email.
I've emailed the hospital that oversaw my treatment, as I would like to look into donating to them first. If they have further guidelines, I will post them here as soon as I have the information.
Thanks to everyone who has been so supportive thus far. I know this is a brand new project but it is already off to a great start! :)
It Begins with a Stitch
Some of my earliest memories involve hospitals. Born with a rare birth defect, I've had a lot of experience with them, from endless trips to the ER until I was diagnosed, to two major surgeries at age four, and then follow-up testing afterwards to make sure the problem had been resolved -- tests which were painful, invasive, and frightening. One time, when I went in for (yet another) round of tests, a technician gave me a doll that had been hand-made and donated to the hospital to comfort children like me. I still have the doll, and the memory of how much better it made me feel. I don't know who made it, but I've always been grateful.
Recently I've been learning how to do amigurumi. I always loved crafts, and have been doing cross stitch, crochet, and jewelry making for many years. What I would really like to do is make some creatures to comfort those who were, as I was, desperately in need of some. I've created this blog to document my journey and in the hope that others will join me along the way. I would like to think that this project will someday be bigger than I am; even if that doesn't pan out, I'm determined to add a little bit of happiness to what can be a dark and lonely place.
Recently I've been learning how to do amigurumi. I always loved crafts, and have been doing cross stitch, crochet, and jewelry making for many years. What I would really like to do is make some creatures to comfort those who were, as I was, desperately in need of some. I've created this blog to document my journey and in the hope that others will join me along the way. I would like to think that this project will someday be bigger than I am; even if that doesn't pan out, I'm determined to add a little bit of happiness to what can be a dark and lonely place.
Subscribe to:
Posts (Atom)